
 |
|
||||||
| Session to train players to recognize the correct times to dribble or run with the ball. To train players to recognize the correct positions to dribble or run with the ball and assess the risk in dribbling. This session aims to improve decision making on the ball in relation to dribbling opportunities. Dribbling tehnique is discussed and the ability to draw defenders to create space for the ball carrier or others. |
|||||||
|
|||||||
| Diagram 1 - Space Infront to Dribble | |||||||
| ORGANISATION: | |||||||
|
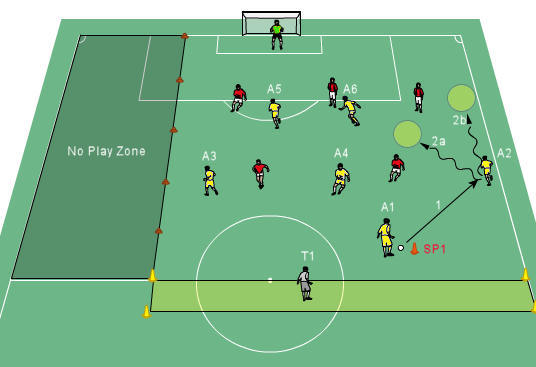
Mark out 1/2 of a full size pitch. Mark out a no play zone where the players do not play to allow play to be compacted to one side of the field. This allows us to work with one half of the field only. Starting position indicated by the yellow cone (SP1).
|
|||||||
| INSTRUCTIONS: | |||||||
|
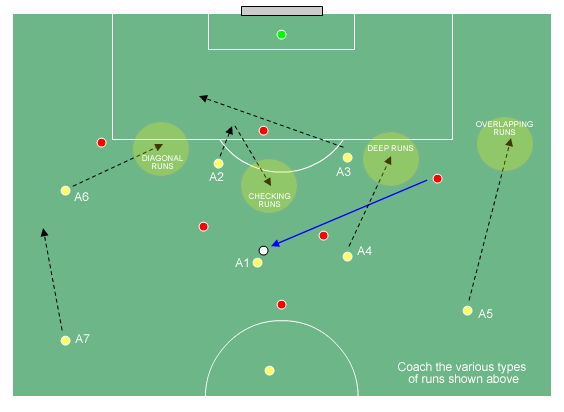
In the example above the yellow attacking team combines with each other to find an opportunity to dribble (drive) into space. Switch the roles of attacking and defending after 10 minutes. The restart positions can be varied, SP1 is the primary starting position. The coach works with the attacking team to identify the key moments when there is an opportunity to dribble into space. The target player T1 can be used to keep possession for the attacking team. Diagram 1 1. A1 passes to A2. 2. a) A2 assesses the field and has space to drive inside, opening up space on the wing area. b) A2 recognizes space down the line and attempts to beat the defender 1vs1 outside.
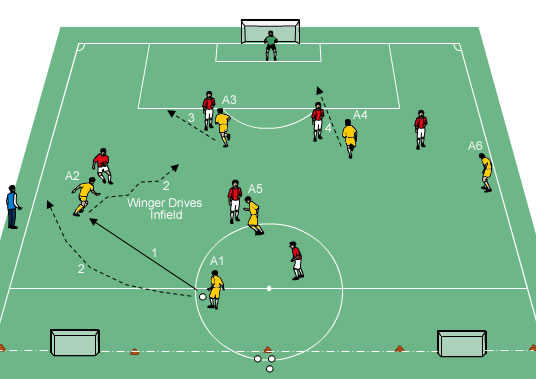
Diagram 2 3. A2 plays a square pass into CM (A4) who makes an attacking run and finds space to dribble. 4. A4 dribbles into space and attempts to commit defenders look for 1-2’s or shoot, etc. note A6’s run away from the ball to create further space for A4.
Diagram 3 5. A6, the close forward checks into the seam area. 6. A2 passes into A6 to turn and drive into space. |
|||||||
| SCORING: | |||||||
|
2 teams compete and attempt to score. The attacking team scores by scoring on the goal. The defending team scores by clearing the ball out to player T1 for a point. |
|||||||
| KEY COACHING POINTS: | |||||||
Refer to the diagrams 2 and 3 for other scenarios to coach in this functional drill.
|
|||||||
| Diagram 2 - Lay Off to Someone Who Can Dribble | |||||||
 |
|||||||
| Diagram 3 – Forward Checks into Space to Receive and Turn. | |||||||
 |
|||||||
| PROGRESSION | |||||||
|
|||||||
| VARIATIONS: | |||||||
|
|||||||
| NOTES AND OBSERVATIONS: | |||||||
| Encourage positive forward movement when possible if a player has space in front of them. Players need to be in good space to receive and dribble, use the full width of the playing area. |
|||||||
| Diagrams were generated using EasyGraphics. |
Coach When and Where to Dribble
- Details
- Parent Category: Main pages
- Category: Ajax Scroller Articles
 Alexander Trukan

 Darren Pitfield