





Session: AO.061 
 Age: 12-Adlt |
 Intensity: Medium |
 Time: 25 mins |
 Positions: 2,3,4,5,6 |
 Players: 12 |
 Area: 40x30 yrds |
Exercise Objectives
- To train the ability to build up and play out from the back.
- Maintain possession in the defensive third.
Organisation
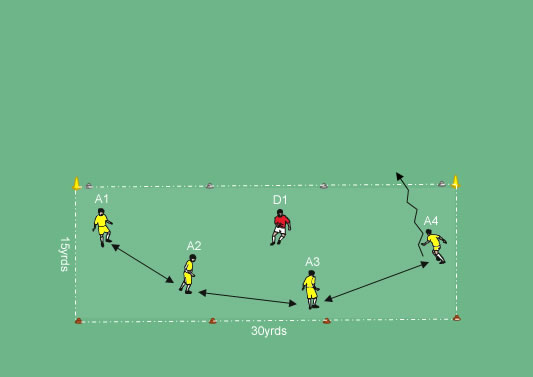
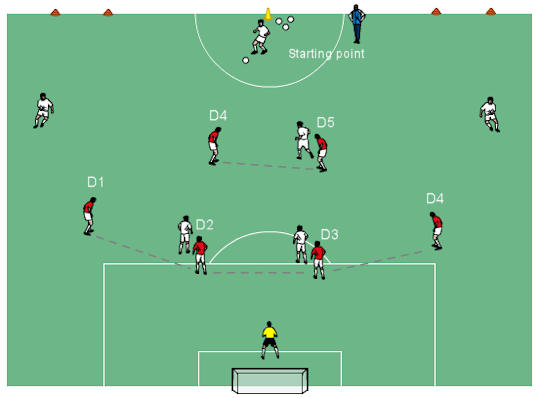
Diagram 1. Set-Up Arrangement
Set-Up
- How to create space.(i.e. check away from where you want to receive, takes defenders eyes off you, push off the defender to get separation).
Instructions/Start Position(s)
- The 4 defenders (yellow) attempt to keep possession of the ball (4vs1) and score by running the ball over the opposite line. The line represents the midfield area of the field. When the opportunity arises the defenders dribble (run with the ball over the line).
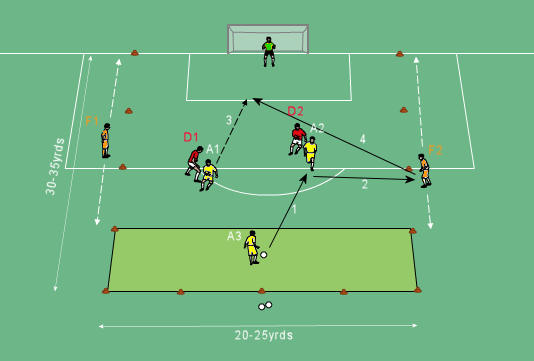
- Set up a second area (shown in Diagram 2) for the other players on the team performing the same drill in the opposite direction.
Scoring
- Score by dribbling across the white line (defenders). Attackers score by dribbling back over the end line (orange line).
Coaching Points
- Spread out when in possession of the ball. The 2 outside defenders should go as wide as possible.
- The back 4 assumes a half moon shape.
- Supporting angles should be good.
- Communication between the defenders.
- Placement of the passes in front of each other.
- Look up to see if the ball can be dribbled forward.
- Receive with an open body stance.
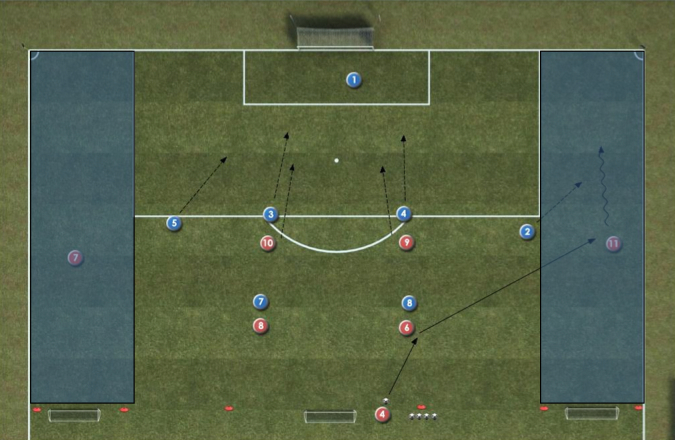
Diagrams below 2,3,4 – Progression to 2 Groups and to 4vs2 with goals:

Diagram 2.

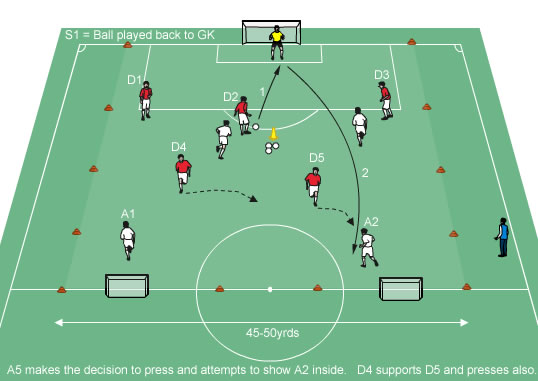
Diagram 3.

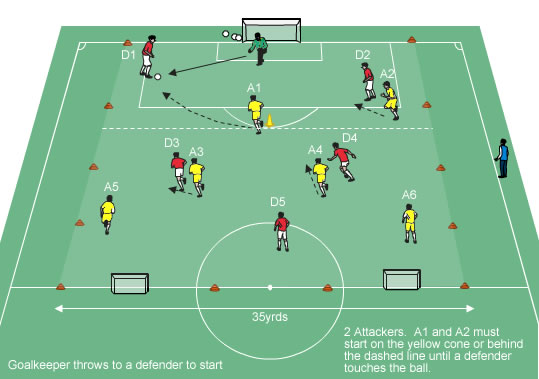
Diagram 4.
Progressions
- Change the number of defenders to increase the difficulty (depending on the numbers you have available; 4vs2, 3vs1, 4vs3, etc). Refer to Diagram 3.
Variations
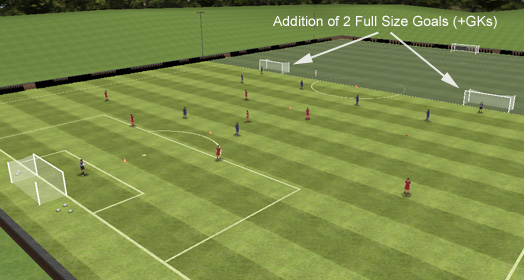
- Add two goals and have the strikers who were originally just pressing and pressurizing combine with their own back 4 in attempts to score. A4 runs with the ball into the other half or can dribble across and combine. Once the ball is lost or a goal is scored he/she returns to their own half. Refer to Diagram 4.
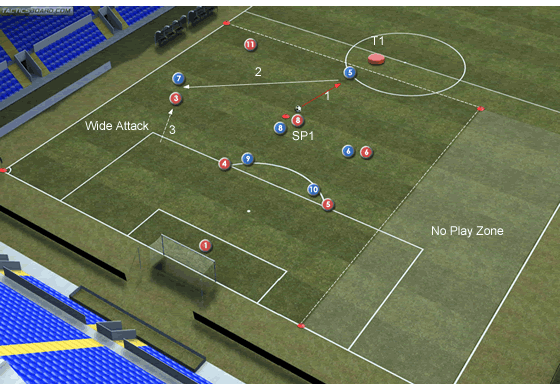
- With the same playing area, this time the ball must be passed across the half way line. Once a successful pass is made into the forward, one other player can step forward across the half way line to support in the attack. In Diagram 4, A1 (third man runner) steps forward to support. Once the ball is lost or a goal is scored he/she returns to their own half.
- The attacking player stays in the attacking half at all times. 2 defenders are allowed to join him by either passing or dribbling over the half way line. 2 players hang back and offer support from behind.
- Finally add another attacker to make this game 6vs6. The area may need to be increased in length.
 Darren Pitfield
 Alexander Trukan

 TonyDeers