Organisation

Diagram 1. Set-Up Arrangement

Diagram 1. Types of Finishing Techniques
Set-Up
- Using a 1/2 field and a full size goal place cones in the positions shown above.
- The coach usually is actively involved in this drill, but can be replaced with a player if desired.
- A large supply of balls is needed for this or players possibly as ball collectors behind the goal.
- Rotate the players after 5 minutes at one of the lines.
Instructions
- A1 starts with the ball and passes into the coach.
- The coach then lays off the ball.
- A1 runs in.
- A1 shoots with a driven/laces shot. AT THE SAME TIME A4 passes into the coach.
- A1 then continues and runs around the outside yellow cone. AT THE SAME TIME the coach lays off ball for A2.
- A3 passes the ball down the line in front of A1. AT THE SAME TIME A2 runs in.
- A2 finishes the lay off from the coach.
- A2 and A4 then run into the box with curved runs.
- A1 delivers a cross for A2 and A4 to finish.
- A2 and A4 shoot/head/volley on goal.
- The sequence then repeats with those players going back to their lines.
Scoring
- Personal tallies can be kept and compared.
Coaching Points
- Good driven shooting technique (Knee & Shoulder over ball, non-kicking foot, etc.)
- Correct technique for each attempt on goal.
- Hit the target (force a save from the goal keeper).
- Shots should be low and hard.
- Timing of runs.
- Curved runs when finishing crosses.
- Near and far post runs.
Progressions
- Different types of crosses, low, driven, aerial.
- 2 touch finishing.
- 1 touch finishing.
- Add a passive defender in the penalty area to defend the crosses.
- Add an active defender in the penalty area to defend the crosses.
Variations
- Add a cone that A1 has to dribble around and take on before shooting.
- Add a second striker who looks for rebounds only.






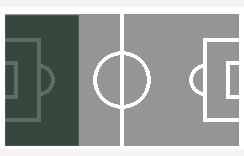
 Age: 15-Adlt
 Intensity: Low
 Time: 25 mins
 Positions: 7,9,11,10,8
 Players: 6+
 Area: 1/2 Field